

Accounting and Invoicinglesson 2 of 5
Written lesson
Create, confirm and send a customer invoice, and correct one with a credit note.
Read the lesson →Invoice a customer
Course contentslesson 2 of 5
Accounting Basics4 min
Invoicing6 min
Bank and Cash6 min
What Invoicing gets you to
- Create, confirm and correct a customer invoice
Most invoices come from a sales order (Create Invoice on the order), but you can also start one in Customers › Invoices with New.
- Choose the Customer. Their address and payment terms come with them.
- Set the Invoice Date and the Payment terms (for example 30 Days); together they give the due date.
- Add the lines: product, quantity, price and taxes. The totals and the tax are worked out at the bottom.
- Click Confirm. The invoice gets its number and is posted to the books.
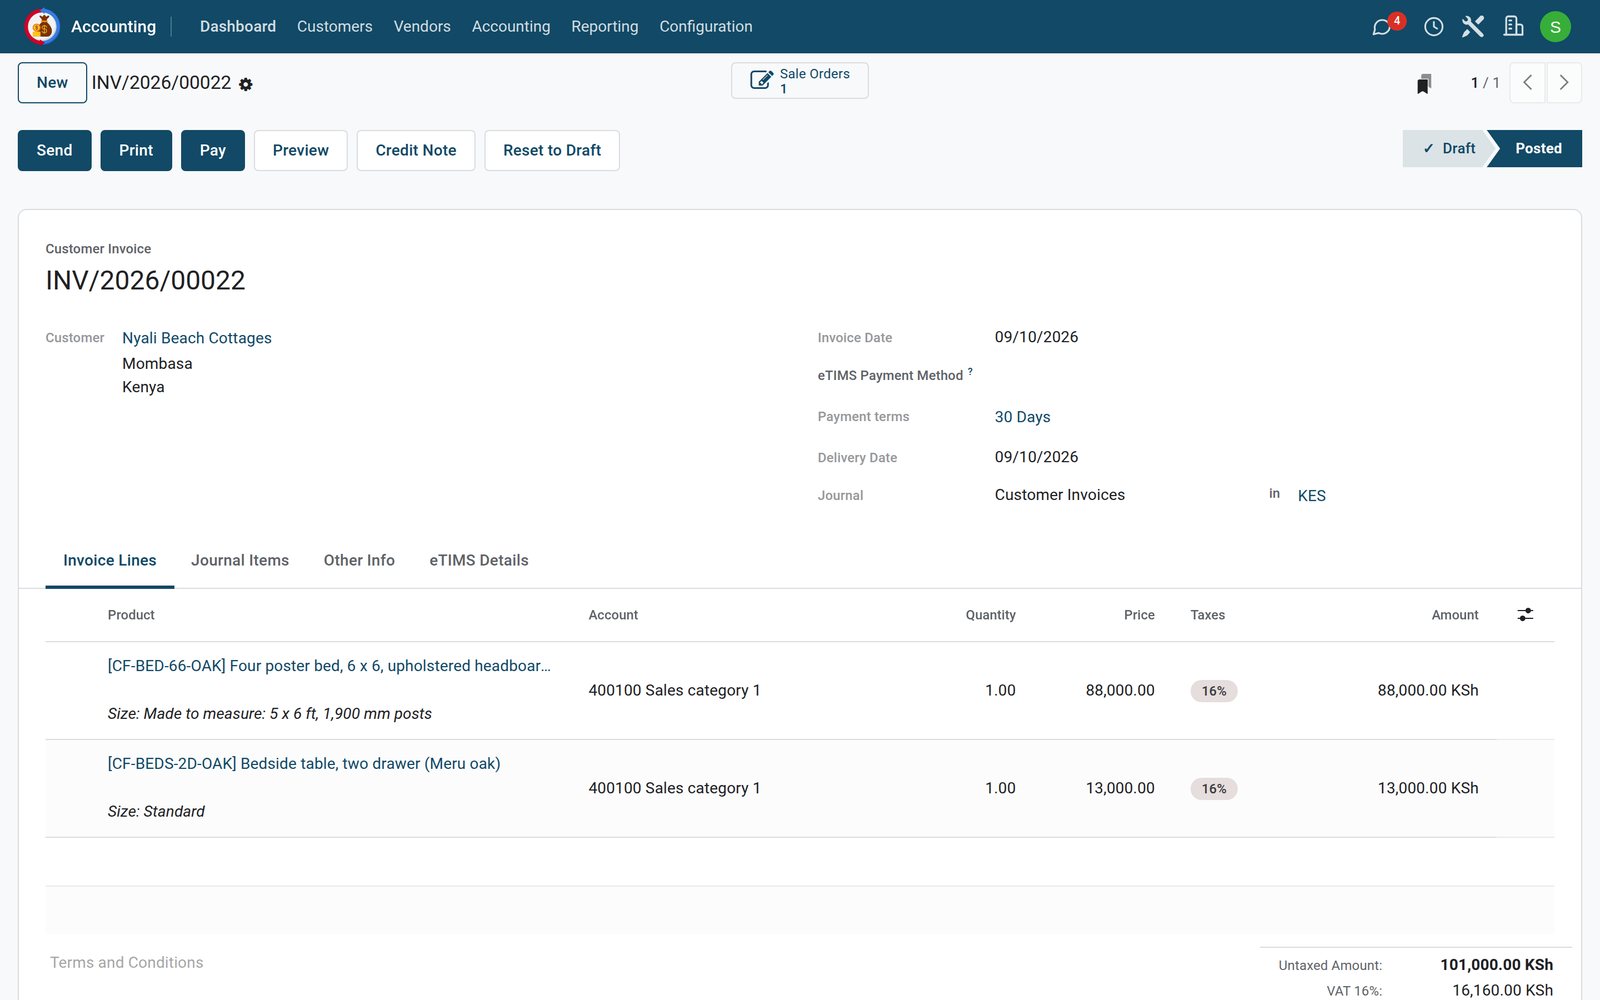
Once it is posted
- Send emails the invoice to the customer as a PDF; Print downloads it.
- Pay records a payment (next lesson).
- Credit Note cancels all or part of it with a negative invoice: the right way to correct an invoice the customer already has.
- Reset to Draft reopens it for editing. Use it only before the customer has received it.
Tabs for your country's e-invoicing appear when that localisation is installed: the demo company is in Kenya, so its invoices carry an eTIMS Details tab.
Check what you learned
Loading the quiz…
These lessons were recorded on a working BridgeERP. Start a free trial and follow them on your own.